Crafts / Metalwork / The Best Exercise Equipment
In the parks or in military facilities you have been using the horizontal ladder stations. In this article I shall present how I made one of those in my backyard. From knowldege you should have only welding skills, but if you don't want to go through this, any professional workshop can make this equipment for you if you instruct them according to this text.
How it all began
 |
Here you see the starting procedure of making horizontal ladder equipment - the ladder itself.The long pipes are thicker (2,5mm) and the cross bars thinner (1,6mm). The outer diameter of pipes is 34mm all around. What seems to be the problem then? Let us see the zoomed part: What you need is the procedure for cutting cross bars so they follow the bearing pipe shape at their ends. Very well, but how are we going to make the cut? |
Cutting cross pipes
My cutting method: by means of descriptive geometry. That is the class in school you probably missed, or over-slept. Now here is your chance to catch up with school knowledge again:
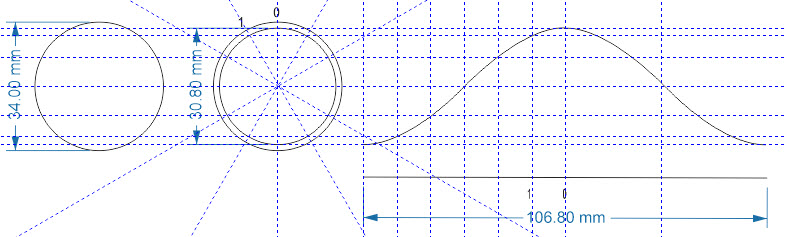
Observe the curve on the right in the picture. The length segment of 106,8mm is the outer circumference of pipe, and the curve itself presented is the envelope used to cut pipes. The segment 106,8mm is divided in 12 segments and those will make for vertical lines (abscissas) which marks the horizontal positions of every point 0, 1,... in the right part of picture.
Points 0, 1, ... are formed in the middle part of the picture as well, by dividing the pipe cross section in 12 equal segments of 30 degrees each. The inside of cross pipes will touch the outside of bearing pipes: hence in the middle picture we shall mark points 0,1,... on the inside diameter of cross bar. The middle picture will designate the position of horizontal lines, i.e. the height of every point 0,1,... in the right side of the picture (ordinates). The envelope points in the right picture will be obtained in the intersection of horizontal lines (height of point, ordinate of point) and vertical lines (abscissas of points).
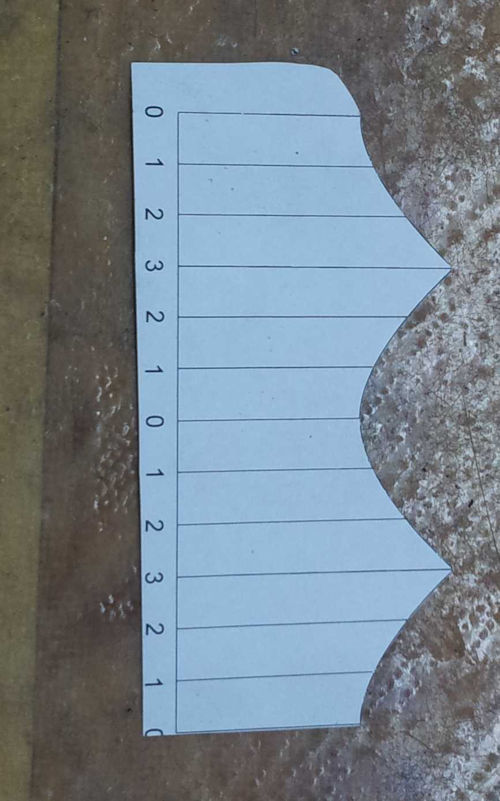
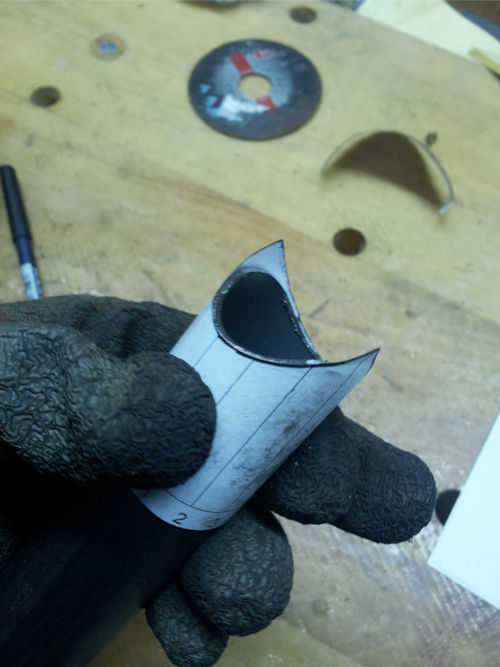
How are we going to use it all? First print the envelope and cut the paper along envelope line (see picture on the left). Then bend the paper circularly and overlap the end points (the end points of 106,8 line segment). The banded paper should be stuck on the end of pipe as shown on the right picture.
The printed envelope you see in the example is not same as the envelope above that you actually need to make. I was using this one instead, but the result is the same.
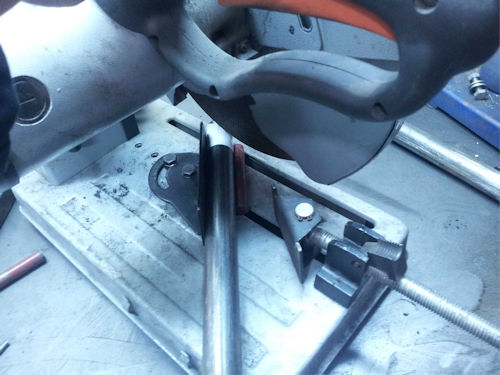
How are you going to cut along envelope? Use the abrasive chop saw to cut straight segments, and then use the grinding machine to finish the tip. At all times at the top of the bar you are keeping your paper template to show the cutting lines you need to follow.
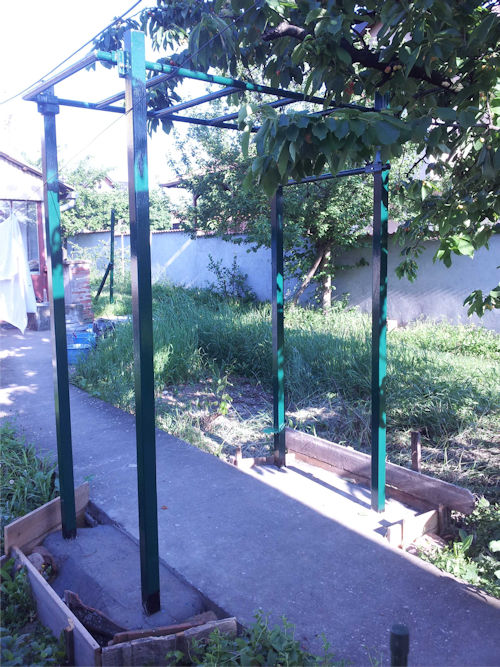
The horizontal ladder
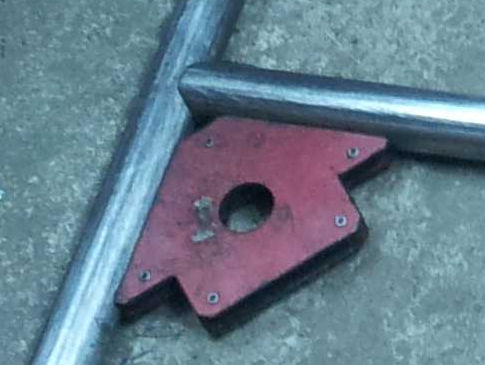
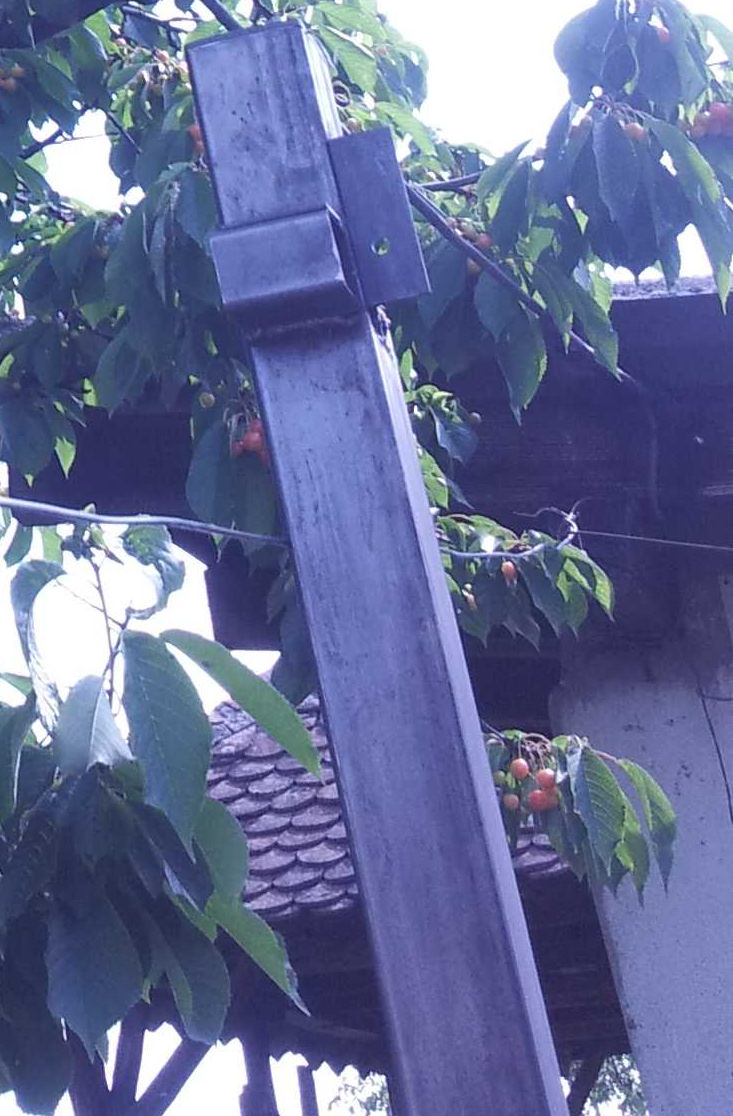
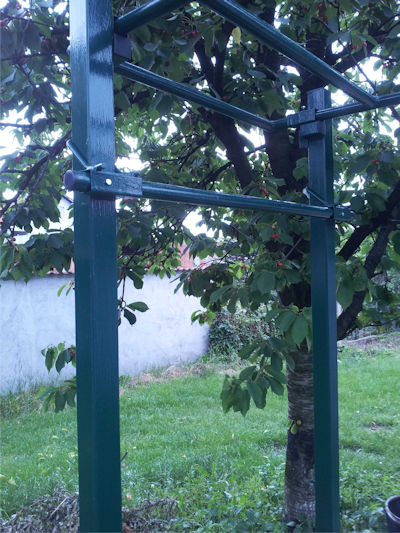
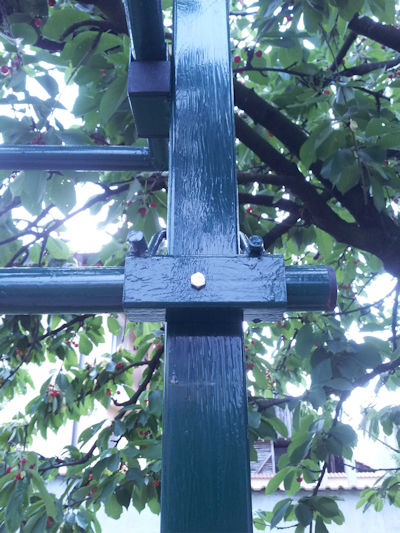
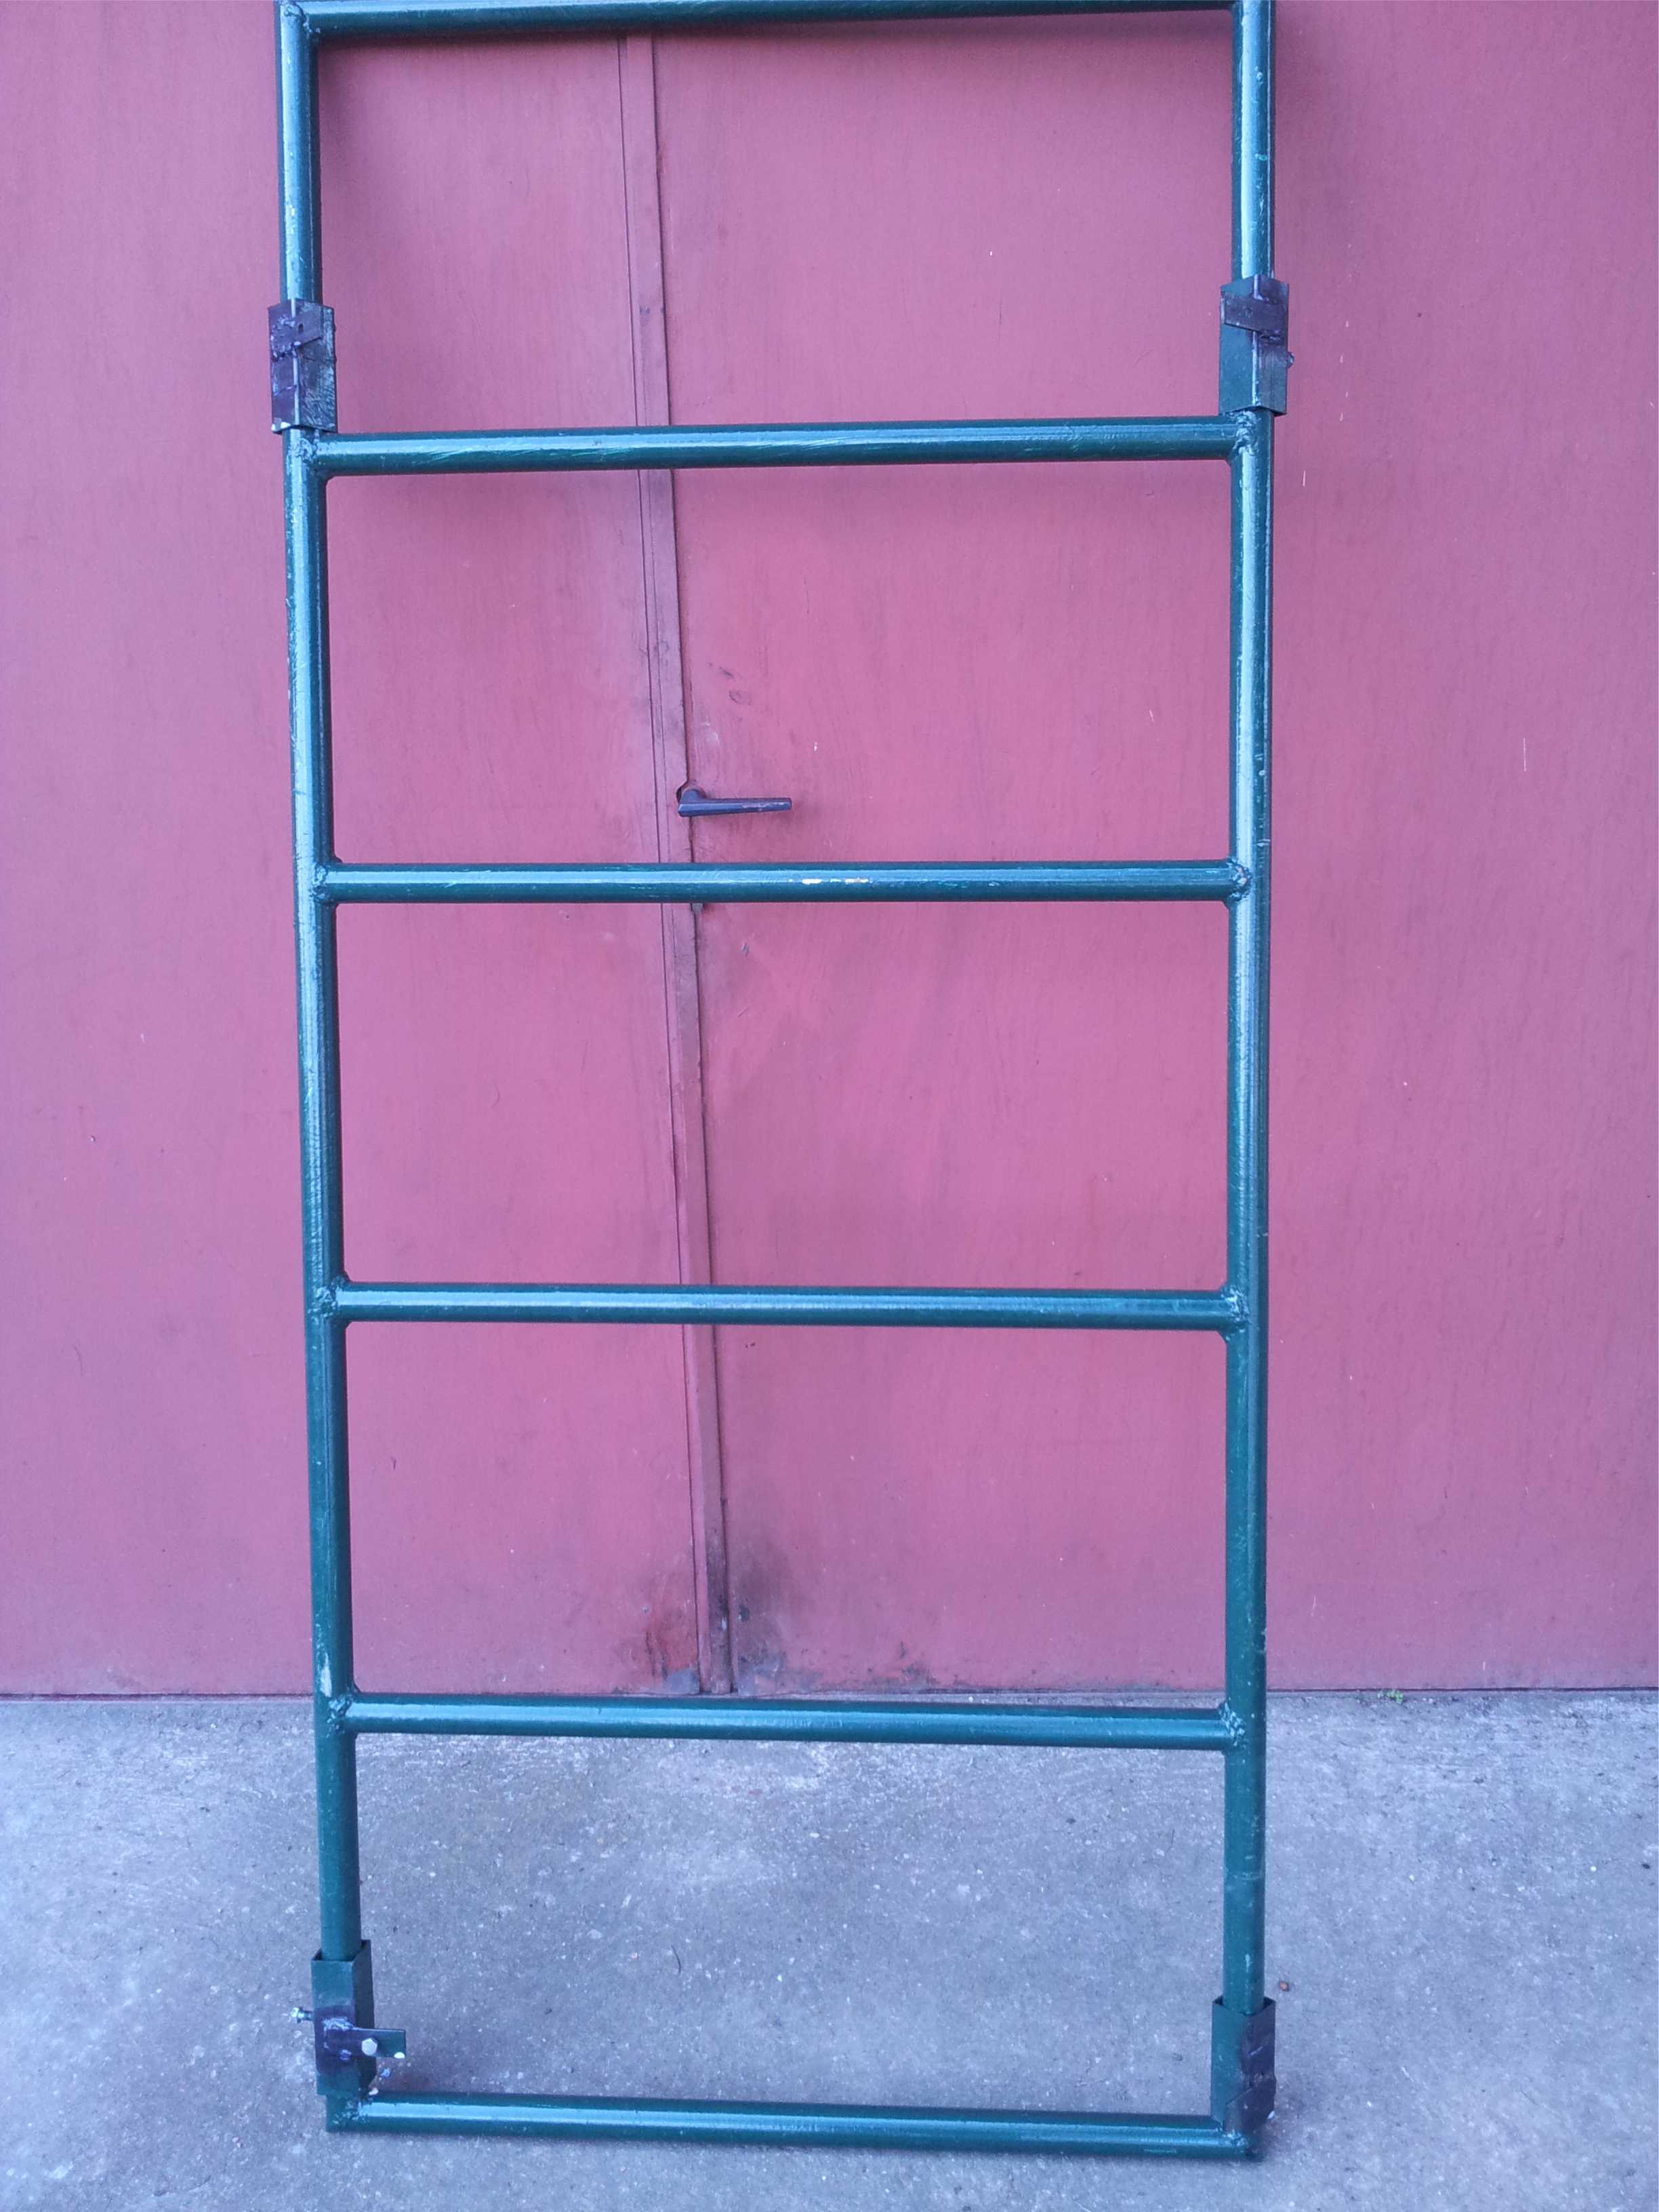 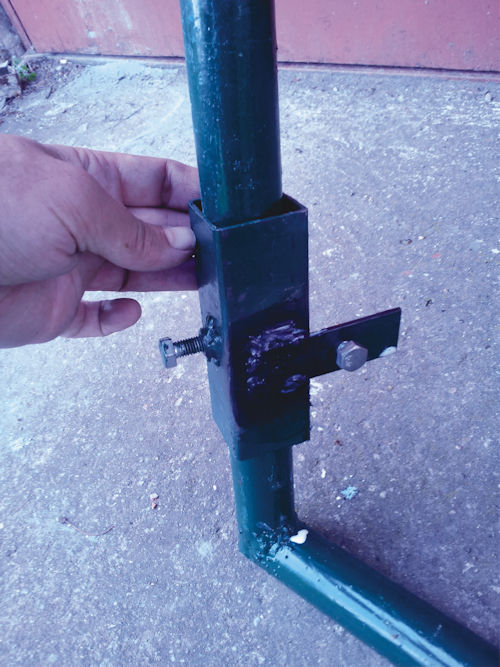 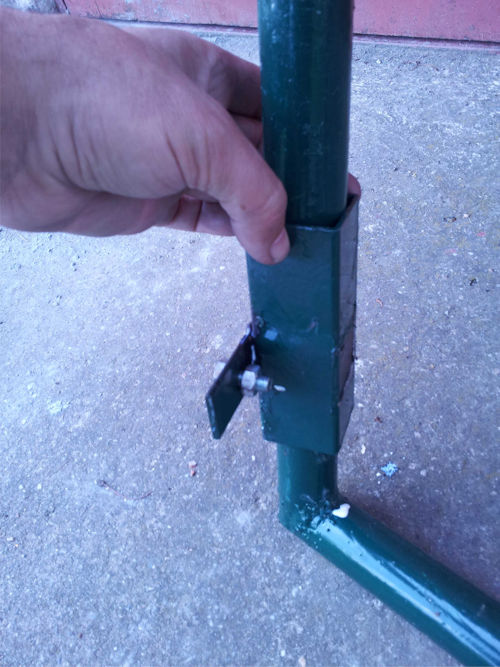 The finished ladder look can be seen in the pictures. The finished ladder look can be seen in the pictures. Pay attention on 4 profiles in the corners of ladder. The ladder profiles will be used to mount or dissmount the horizontal ladder on the posts. The ladder profiles will also allow for adaptation of ladder to posts so the leveling of posts will be less critical issue in the overall design. Every profile is made of square tube slipped on the ladder tube. The profile has two screws. Screw one, positioned on the flat steel bar will be used to fix the profile to the post. The screw number two on the profile will fix the profile to the horizontal ladder. |
The posts will carry the ladders on the top of profile carries. In the next pictures one can see those carriers from various angles:
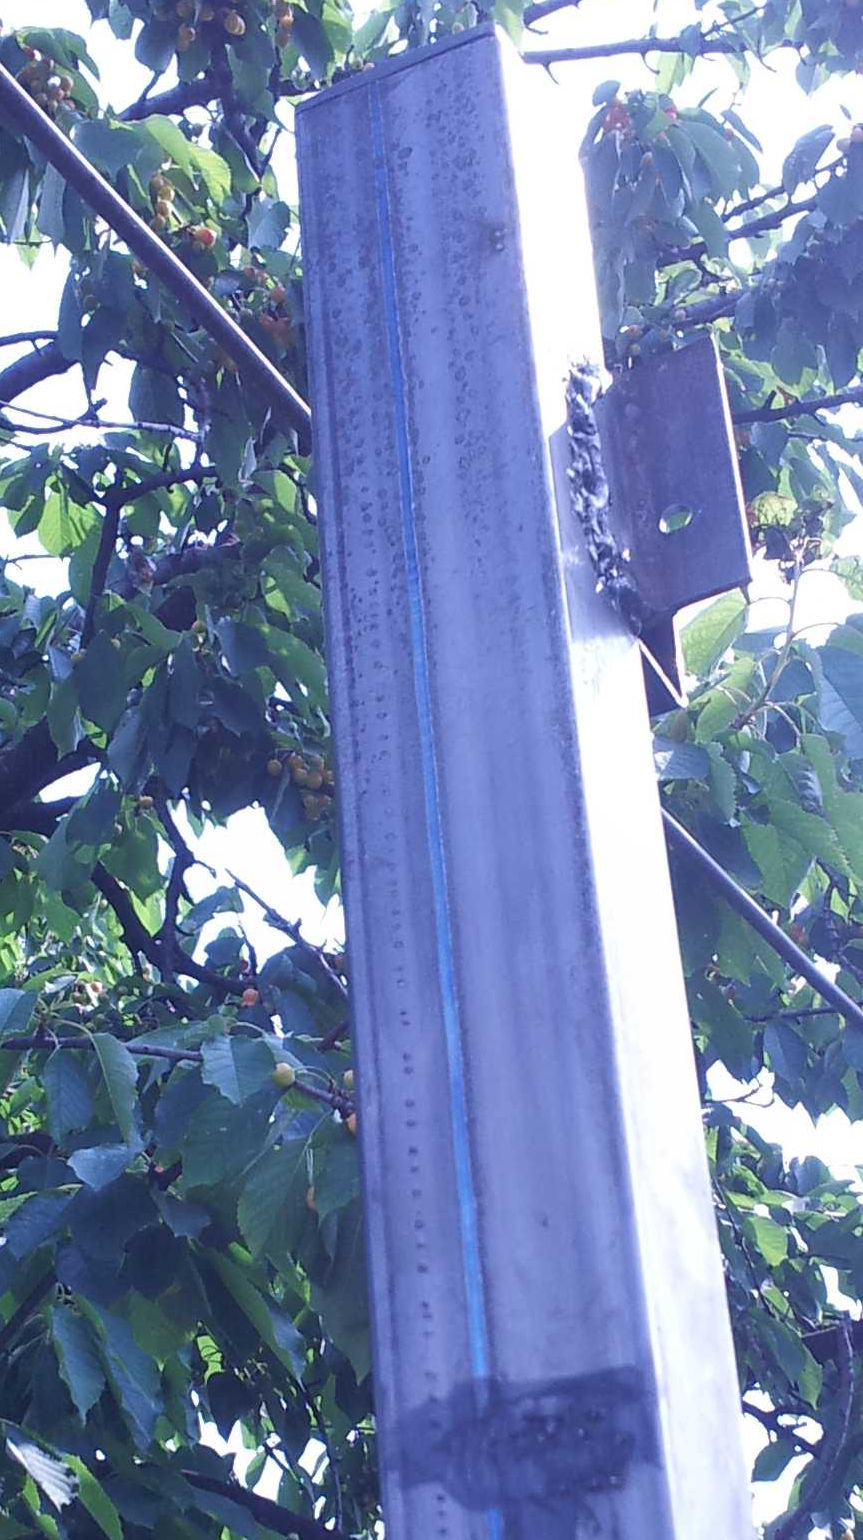  |
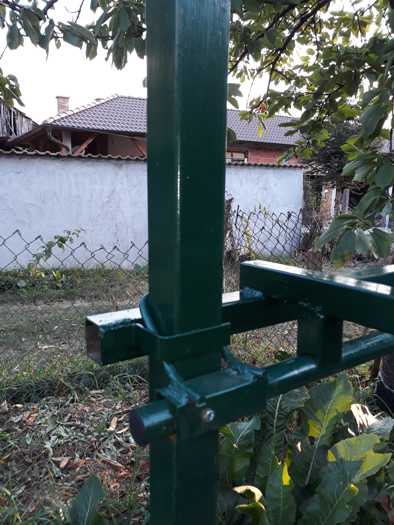
The carrier consists of horizontal square tube and L-profile. Horizontal tube will be the carrier to bear the ladder profile. The L profile has a hole for a ladder profile screw, by which the ladder profile will be fixed to the post.
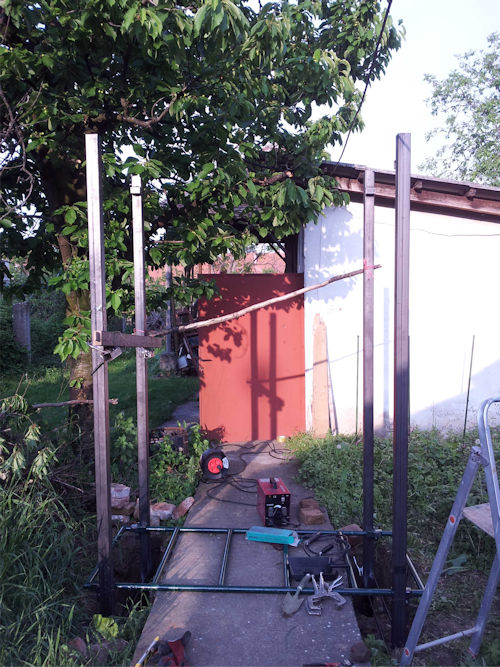
Putting up posts
Although seeming deceptively easy, the posts should be carefully leveled. You need the horizontal ladder perfectly horizontal after mounting them on posts.
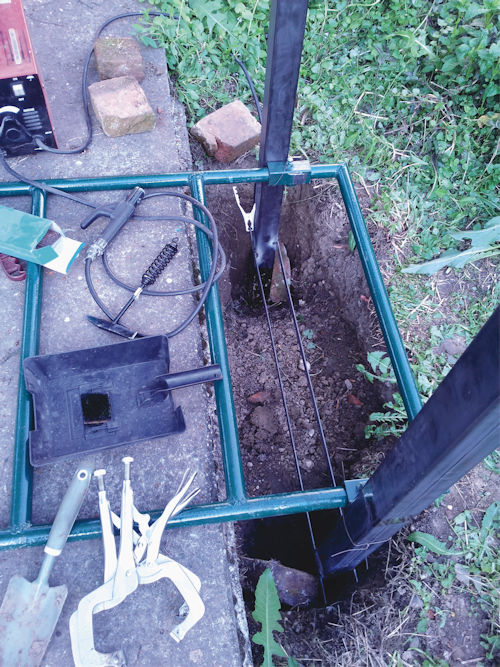
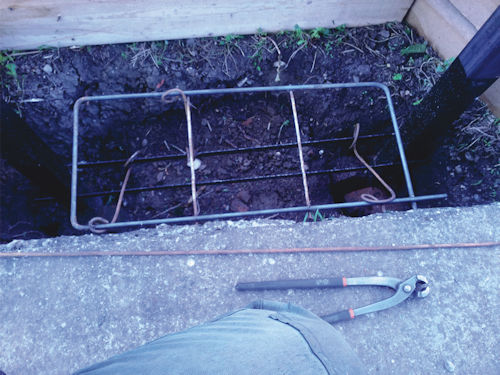
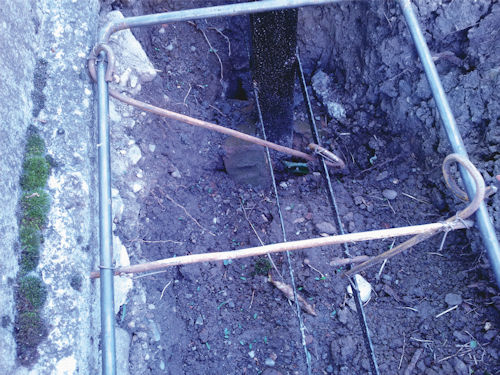
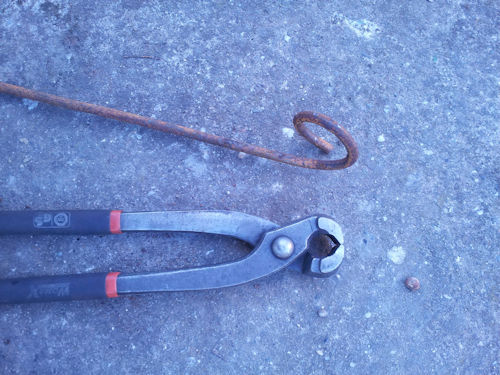
In the pictures you can see the posts put up in the holes in ground. The posts are welded below ground level by two flat steel bars. Additional wire hoops will make for armature. Armature is fixed by means of wire spacers. Then you pure the concrete and that is it.
     |
The cross bar
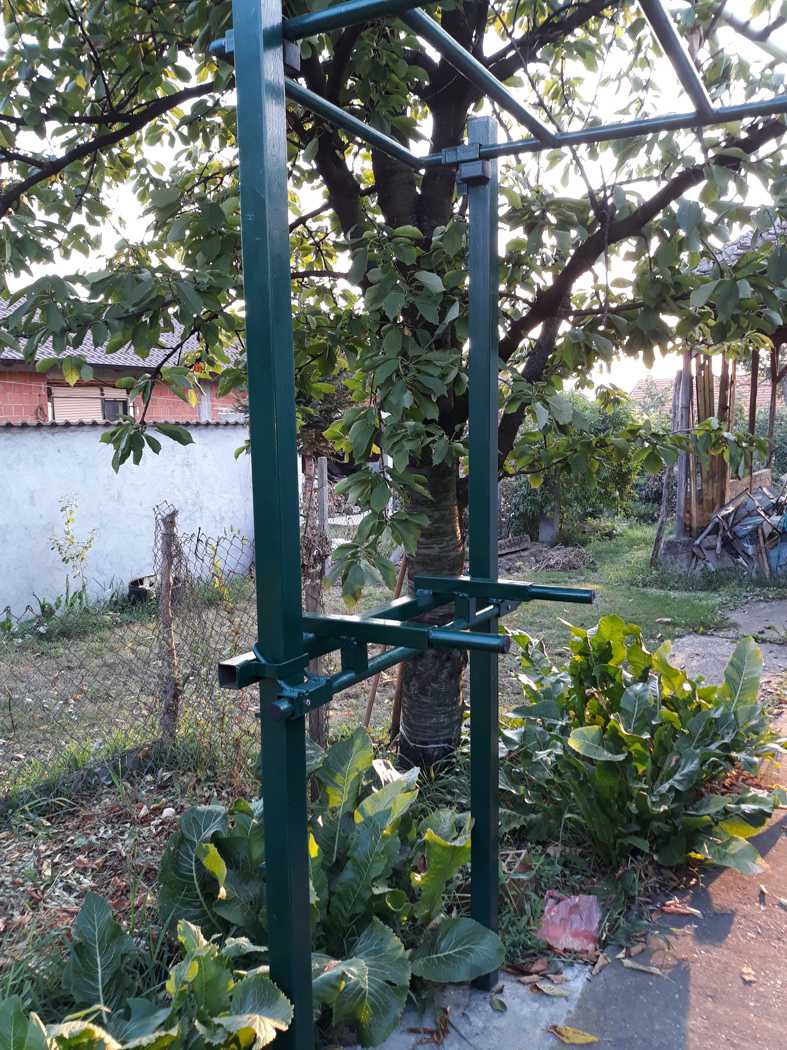
On the pair of posts we shall form the additional exercising device - the cross bar. Cross bar is the side bar on pair of posts that can be vertically adjusted by height. That way even the youngest or oldest family members will be able to choose their height and position the chin-up bar. Additionally the cross bar can be lowered into the lowest position for pushups, or it can be in the middle height range for inclined chin-ups with heels on the ground.
   |
The purpose of cross bar is to complement the horizontal ladder exercise with training for all ages and abilities. Also the cross bar is the excellent preparation for horizontal ladder effort. In cases of lower personal energy or illness recuperation, or getting into the starting shape, the cross bar is just ideal!.
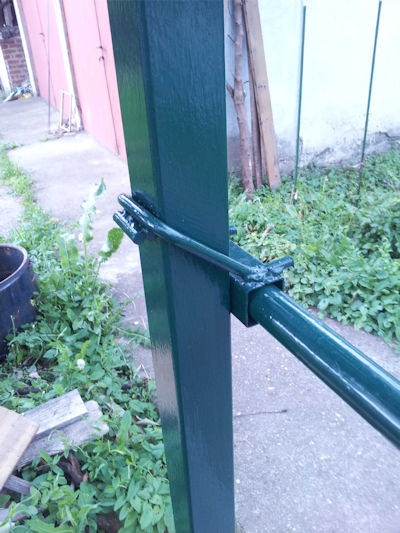
On one of bearing posts there is also a pedal, that can also be set vertically on appropriate height. In the low position the pedal allows one to reach horizontal ladder or cross bar easily. In the higher position pedal is used for stretching the rear thigh region.
|
|
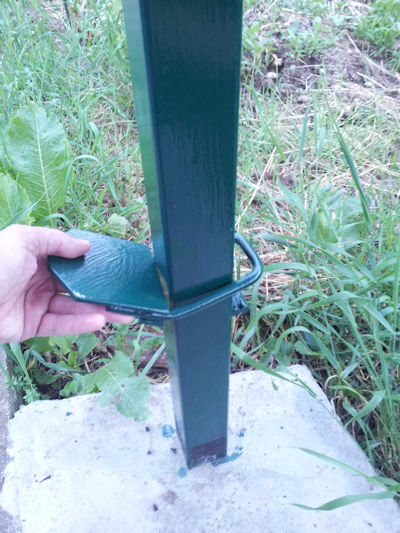
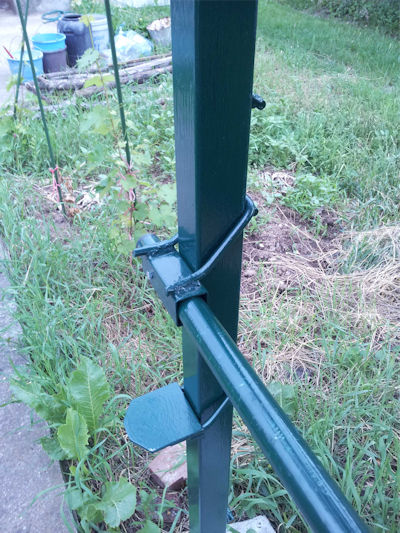
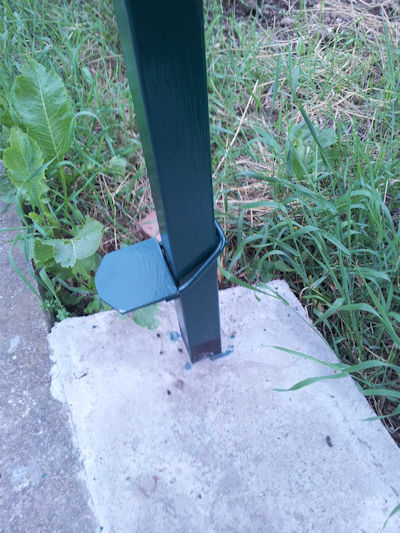
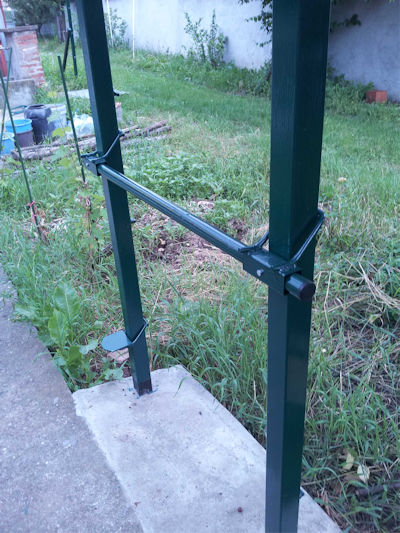
The construction of cross bar and pedal is based on stirrup i.e. the 10mm hoop wire. The stirrup is positioned on the appropriate post peg and hence determine the height of cross bar or pedal.
едале.
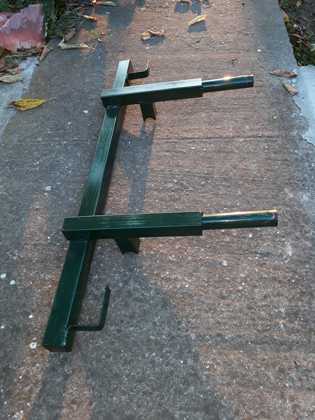
If you think "dip bars" are missing, you are wrong
 |
 |
dip bars, upper and lower view |
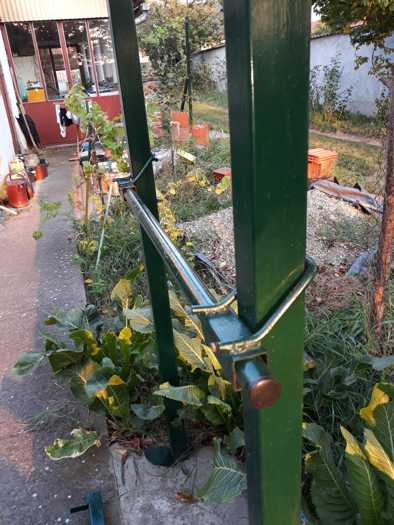 |
Before mounting dip bars we first choose the height of cross bar. |
|
 |
 |
Putting dip bars on cross bar. First picture: beginning of mounting dip bars. Second picture: the final position of dip bars. |
 |
With a simple move the dip bars are mounted and ready for exercise! |
And so we get...
Except for picking cherries above it, this exercising station is the very best training device that you can make for yourself and all members of your family.