Workbench for carpenters in small workshop - extremely stable and strong
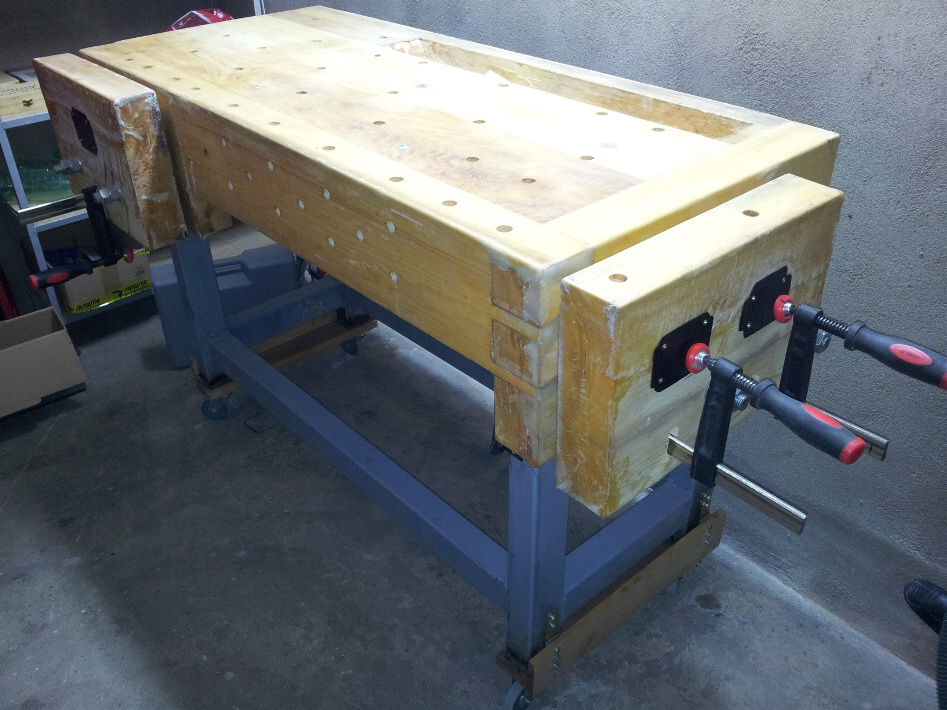
I have a small space, a little more then 7 squared meters for main work in DIY carpentry. My motivation was simple: how to make a small workbench that fits that room and still be heavy and strong as a large workbench. The length had to be 1,34 m without vises. I wanted vises of my own construction and cheaper than factory made. Impossible demands, especially for my first carpentry project, right?
After breaking my head for months, I realized that the problem would not be optimally solved if only wood is used. Without large weight there is no stability. And the stability is IMHO the basic feature of any workbench. So the first problem has been how to pack very large weight in so small dimension. The other problem is the strength of small workbench. When we scale down a plan of large and heavy carpentry workbench and keep the width, height and basic proportions, the resulting small workbench will have small junction surfaces, i.e. it is much weaker than large workbench. But I wanted my bench to have the same or better strength then large workbench as well.
The existing solutions offered a lot of cross stretchers below workbench top but that was not what I wanted because in small room I also wanted to have empty space below workbench table top and generally did not believe that would greatly improve the strength of weak workbench. The other offered solutions with a lot of drawers I did not like for the same reason and anyway I do not intend to bend constantly to open a drawer, pick a tool, close the drawer, and rise again: that is very bad for one’s back, right?
So I decided to combine wood with metal. This is just one of the problems when two technologies meet: wood and metal at their best. With large carpentry table that is not necessary because the massive wood and large length keeps weight of large workbench above the critical one. But the small workbench simply cried for appropriate solution. Even worse than that my special problem was at the beginning of this project I did not have almost all of carpentry tools, no carpentry experience except one shelf done more then decade ago with a jigsaw, and what’s more I have not been doing anything in steel – ever. So first I read on Internet what tools are needed for this work, bought some of them, and started torturing myself and the material :-).
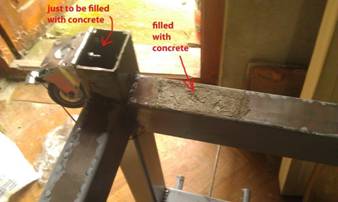 |
Then I managed somehow to weld the metal base fully around in joints and then filled them with concrete. For your reference, as for 1,3m length, if all four workbench legs and all four longer stretchers are filled with concrete, workbench achieves and maybe surpasses the weight of 2,3m workbenches standard size, having around 160kg (350 pounds). In the picture the wheels are mounted directly to the leg and that proved to be unreliable and not practical in my experiments, so I abandoned that construction in favor of the other solution with L-sled explained at the end of this text. The rest of steel sections I filled with polyurethane foam to achieve sound damping. The interesting feature of that particular construction is that user can adopt appropriate weight of workbench without changing any constructional details or dimensions. For your purpose you can make the workbench heavier (!) or lighter at will. |
Then on the basic metal construction I added the guiding pipes for vises:
Here are my dimensions of the whole metal part of the workbench:
 |
 |
Finally the wood! The tool chest is made in one of boards by cutting small cubicles with my handheld circular saw and then used my chisels:
 |
 |
The wooden top I have done by laminating 80mm thick boards together:
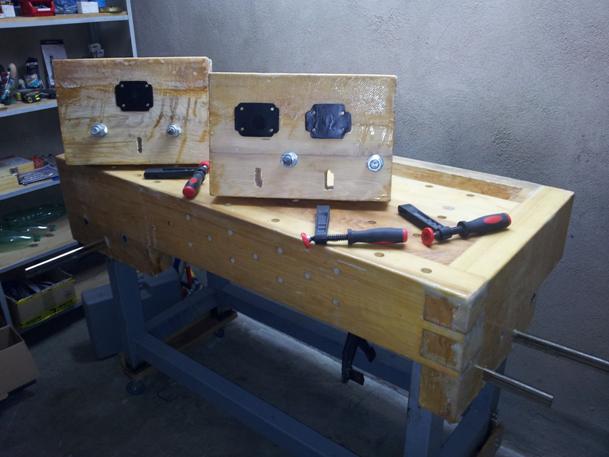
The vises are my specific construction because I did not like what I found on Internet. The commercial vises were too expensive and at the time seemed to me overly complicated. So I made a risky decision to make my own construction: my vises are made of ordinary F-clamps and two pipes only.
Front vise comprise of one F-clamp:
The side vise I chose to be somewhat larger and it comprises of two F-clamps:
Very critical point in my experiments was if the vises would hold – and unbelievably they do exceptionally good! The vise summary: just one or two turns suffice the vise to be locked, so almost immediate open or close operation, particular F-clamp can be retracted into the vise body to make more space if needed, vises are far cheaper then any other professional vise, and even the whole vises can be dismantled in just a few seconds to preserve space in small workshop. The following picture shows the retraction of F-clamp starts by pulling out the secure pin (steel nail actually):
Then the F-clamp is pushed inside:
Finally the side apron of workbench with fully retracted F-clamp and the non-retracted F-clamp side by side with movable vise part dismounted so apron is shown clearly:
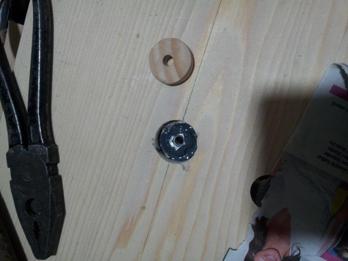
Small detail: making corks on workbench top so some workshop machine bases can be fixed to the workbench when needed:
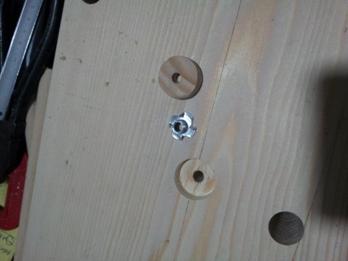 |
Cork, tee nut, hole for the cork. |
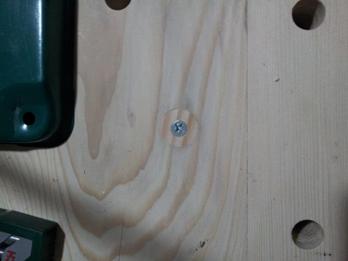
 |
Tee nut in the wood, epoxy glue. |
 |
Cork glued over tee nut and fixed with epoxy glue. It stays that way until some machine needed to be fixed to my workbench top. Behind you can see the base of one machine with the hole; the screw from the tee nut will be released from the cork when needed and will be screwed again through the machine base to the workbench top. That way machine base will be fixed to the workbench and securely operated. |
Also somewhat risky decision: I decided to cover workbench with glass reinforcement fabric and fixed with two component epoxy. Here is the preparation process:
That way workbench is resilient to water, oil and all sorts of chemicals, can be cleaned with water with no problem, and is more resistant to punches.
The workbench is equipped with wheels:
 |
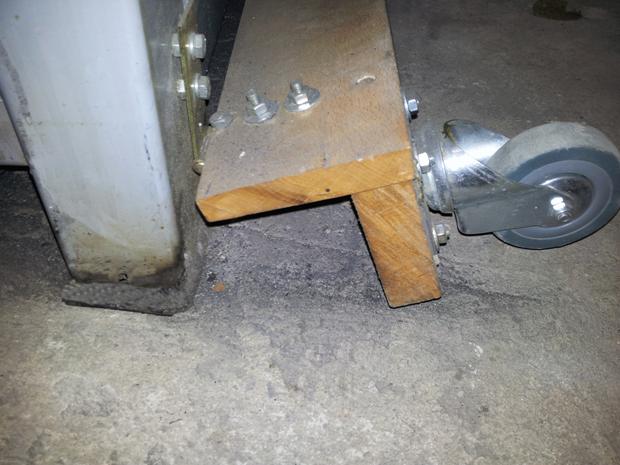 |
In order to implement wheels, after few unsuccessful tries I finally made wooden L shape and mounted wheels in pairs on those L shapes. The wheels can be mounted by lifting one side of table while pushing the L shape with wheels below the table legs, and then the same on the other side.
The workbench I use for about a year now and cannot explain how much I am satisfied with it.
—————————————————————————————————————————————————-
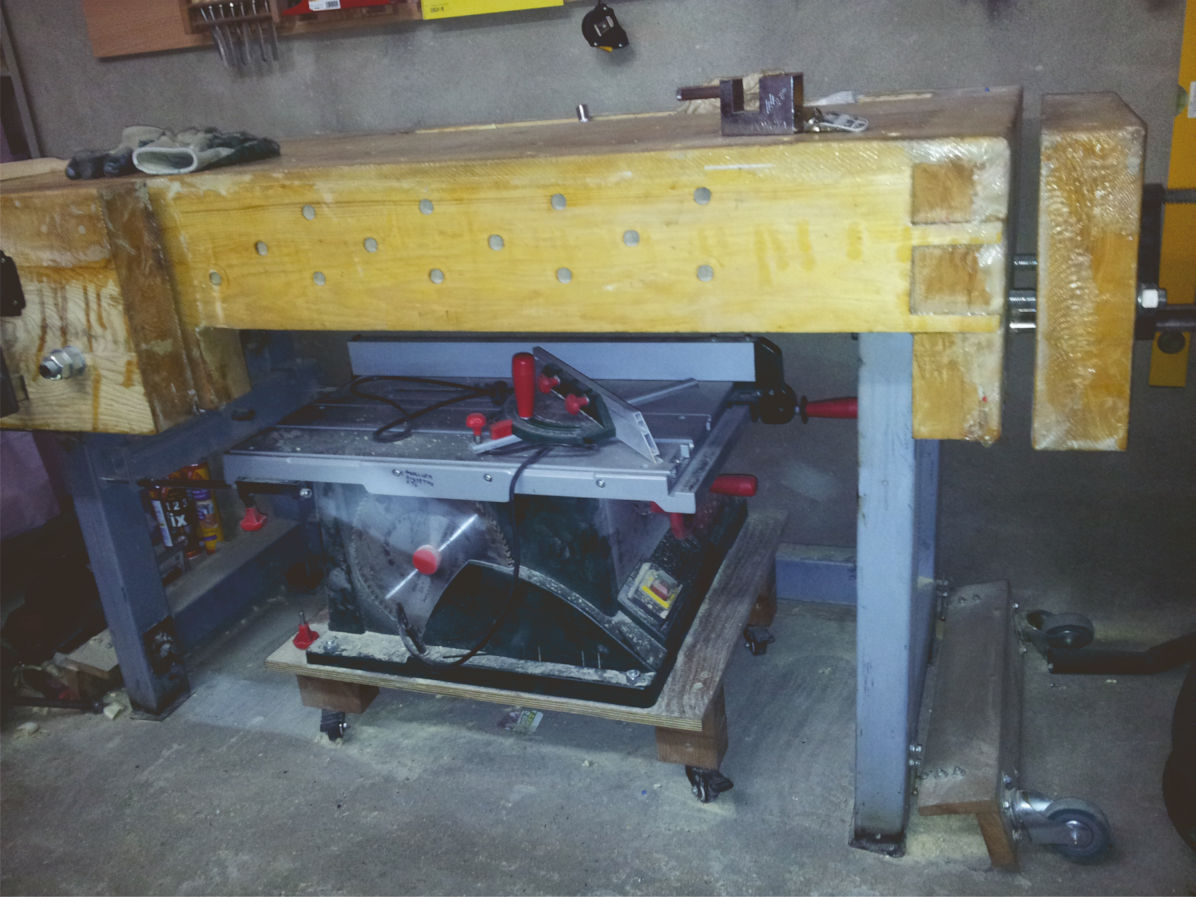
2015: implementing insertion of my circular saw table below workbench by using the long drawer slider:
This was unsatisfactory, because when you want to move the table you have to move the table saw with workbench! Because my days in gym have gone with the wind, I decided to cut the lower down stretcher of my workbench and adopt table saw to lay on a panel with casters. Now instead of sliding in and out, I roll the table saw in and out, which is easier and more flexible solution:
2013